Help topics
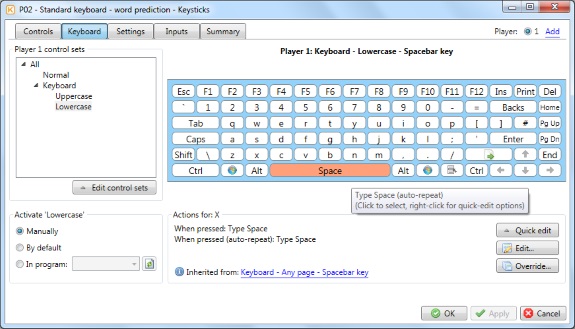
The Keyboard tab lets you add keyboard controls to control sets. This is how you create controls for typing using a controller. When you select a control set which has keyboard controls, the Keyboard tab shows how the screen keyboard window will look.

The picture above shows some controls with a standard keyboard layout. You can see that when we navigate to the Spacebar key in the screen keyboard window then press “X”, it will type “Space”. It’s set to auto-repeat, so holding down X will repeatedly type “Space”.
Let’s look at how you can create your own keyboard controls. Unless you want your keyboard to be shown all the time, the first step is to add a new control set. To do this, right-click an existing control set, choose “Add a new control set…”, then enter a name and press OK (see picture below).

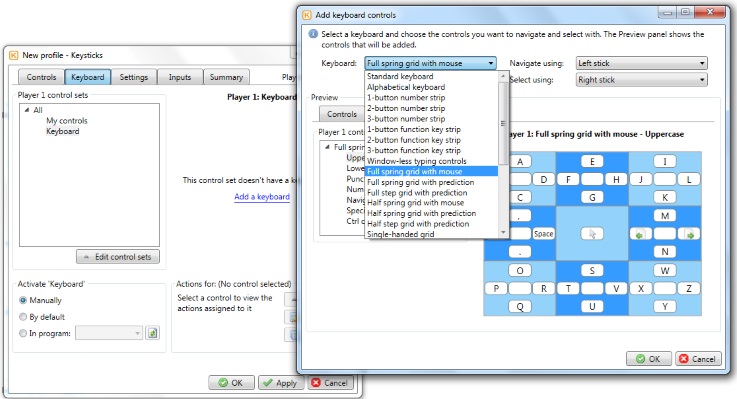
Next, select the Keyboard tab and click “Add a keyboard”. You’ll see the “Add keyboard controls” window, as shown below. There are lots of ready-made keyboards to choose from. When you select a keyboard in the “Keyboard:” drop-down menu, the preview frame will show you what the keyboard looks like. You can also change which controls you want to control the keyboard with i.e. how you want to navigate around the keyboard, and which control you want to select with to do the typing.

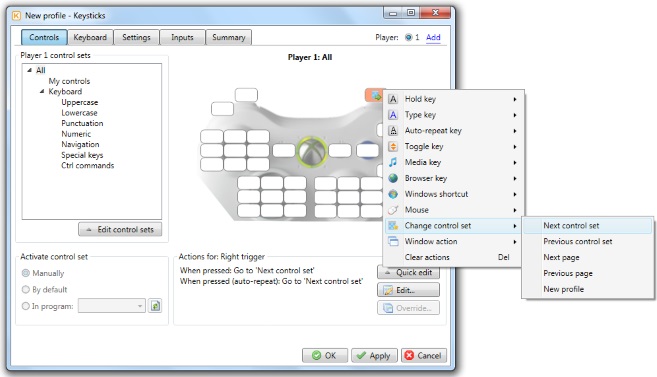
When you have made your selections, click OK and the keyboard controls will be added to your control set. Finally, you’ll want to assign a “Change control set” action to one of your controls to switch to and from your keyboard controls. A good way to do this is to add a “Next control set” action to the “All” control set, as shown in the picture below.

After you have added a keyboard view to your control set, the controls you chose for navigating and selecting cells in it will be reserved for that purpose. If you wish to change those controls, use the “Remove keyboard” option in the Keyboard tab, then use the “Add a keyboard” option to add the keyboard back in, but this time select the new controls you want to use.
