
Help topics
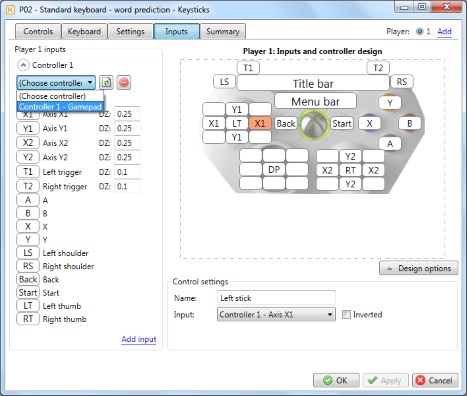
The Inputs tab of the Profile Designer is where you configure which controller(s) you want to use. By default, Keysticks creates a layout and input mappings for a standard gamepad like an Xbox 360 controller, so very often you won’t need to change these. However, you might like to change the background image, just for fun.
Inputs
The Inputs frame on the left-hand side lets you choose which controller to use for the current player. Keysticks supports a variety of controllers, including Xbox 360 controllers (wired and wireless), Xbox One controllers, joysticks and other gamepads. Provided your controller supports XInput or DirectInput and you have a driver for it installed, you should be able to use it with Keysticks.
 If a controller supports XInput, this interface will be used. XInput controllers appear as controllers 1-4 in the list of connected devices and DirectInput-only controllers appear as controllers 5, 6, …
When you choose a controller from the drop-down list of connected devices, the list of available physical DPad/POV switches, axes, triggers/sliders and buttons will update beneath it. These can then be mapped to the controls in your controller layout. You can also change the dead zone values for axis and trigger/slider inputs if you wish, to make them more or less sensitive.
Keysticks applies circular / elliptical dead zones to stick controls using the dead zone values for their mapped X and Y axes.
Normally, each player will only use one controller, but it is possible to add up to four controllers for each player. For example, perhaps you want to control your computer using two joysticks? Or perhaps you want to help a less able person use the computer, using one device each? In this case, click “Add input” at the bottom of the inputs frame.
If you just want to create multi-player controls, add extra players instead. This way, each player will have independent controls.
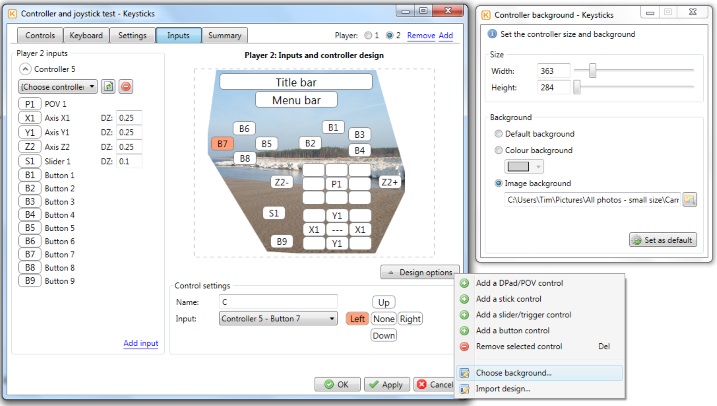
Controller layout
The controller image on the right-hand side shows the arrangement of controls that you can assign actions to in the Controls tab. You can think of them as “virtual” controls, because you can choose how they are mapped to physical inputs. When you click a control, the “Control settings” frame shows which physical input the control is mapped to.
When you want to use a controller or joystick which differs from a standard gamepad, you need to: .
- Add or remove controls from the layout using the “Design options” menu (or right-click in the layout)
- Move the controls around using click and drag
- Give each control a meaningful name and map it to an input in the “Control settings” frame
Keysticks allows you to choose four button controls which can be used as left-right-up-down direction buttons for controlling the screen keyboard. By default, these are the X-B-Y-A buttons. however you can change them in the “Control settings” frame.
You can change the size and background of the controller layout by selecting “Choose background…” from the “Design options” menu.
By default, the controller layout is cropped to just include the controls, title and menu. This saves screen space. If you wish to turn this off, uncheck the “Compact controller window” option in the Program options – Style tab.
To save creating controller layouts unnecessarily, the “Design options” menu has an “Import design…” option which allows you to import the controller layout, input mappings and background from another player or profile.