
Help topics
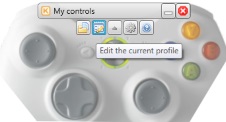
Keysticks provides some ready-made profiles to get you started, but you can also customise the controls and create your own profiles from scratch. This is done using the Profile Designer. To open the Profile Designer, click the “Edit the current profile” menu button in the controller window, or choose either “Edit this profile…” or “Create a new profile…” from the Keysticks program menu.
 It’s a good idea to apply and test controls you create incrementally in a program like WordPad or a single-player game until you’re sure they are doing what you want.
Profile Designer
The Profile Designer shows a visual representation of the controls and settings in a profile. In the top-right, you can add up to four players and select which player to edit. In the top-left, you can see the following tabs:
- Controls: shows what the controls do in each control set
- Keyboard: shows how the screen keyboard will look (for control sets with keyboard controls)
- Settings: shows the directionality and timing settings for each control
- Inputs: allows you to change which controller(s) each player uses, how the inputs are mapped, and the controller layout and background
- Summary: shows summary information and notes for the profile
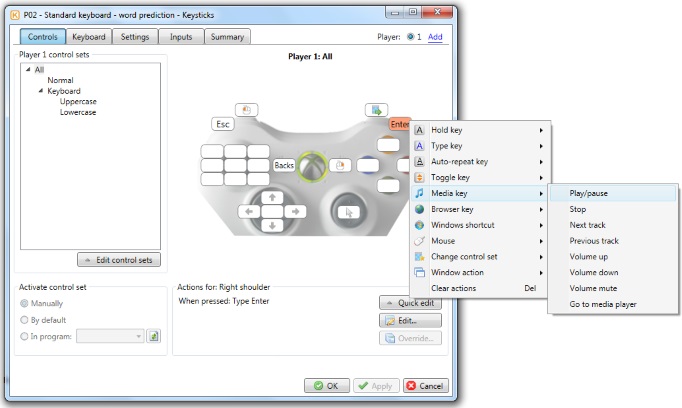
In the Controls tab, you can assign actions to your controller by right-clicking the controls and choosing from the ready-made templates (see picture above). If you don’t find what you want in the right-click menu, there’s an “Edit” button which lets you define your own actions. After you’ve added some controls, you can rearrange them using drag and drop.
Similarly, to add and edit control sets, you can right click them or use the “Edit control sets” button.
Applying and saving changes
When you’ve finished creating and editing your controls, you’re ready to apply them. This means that Keysticks will start doing what the profile specifies when you use your controller(s). You can apply your changes by clicking either “OK” or “Apply”; the difference is that “OK” closes the Profile Designer, whereas “Apply” keeps it open so that you can incrementally make changes and try them out with the designer window still open. Clicking “Cancel” discards any changes you have made since the last “Apply”.
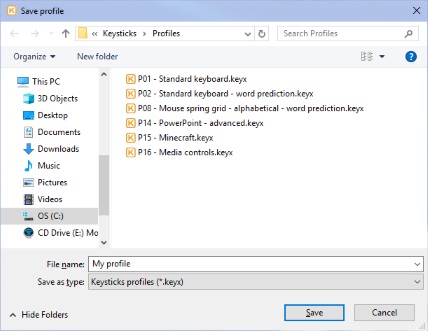
When you’re happy with the profile you have created or modified, you can save it to a file by choosing “Save this profile”, or “Save as” from the Keysticks program menu. “Save as” lets you save the profile to a new file, using the window shown below. If you have unsaved changes when you load another profile or exit the program, Keysticks will ask you whether you want to save or discard them.
It’s best to save profiles in your Keysticks profiles folder (which can be changed in the program options – Folders tab) because then you’ll be able to preview them in the Profile Browser window. If you want to modify any of the sample profiles that come with Keysticks, it’s a good idea to make your own copy first, because they might get replaced when you upgrade to a newer version of Keysticks.
In the next topic, we’ll look at the Profile Designer’s Controls tab in more detail.